 Credit - The Weather Channel |
The WCMS Weather
Team |
|
|
|
|
Here are fifteen simple steps to
creating a sixty second weather report from scratch in less
than 15 minutes. You'll need the iMac computer, a microphone
attached to the computer, the digital video camera, an 8 mm
video cassette tape for recording, and a team of
enthusiastic future meteorologists. Good luck! |
|
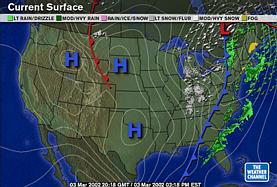
1. Use the video camera to capture either a WCMS Weather Team member or some outdoor scenes for the opening segment of the broadcast. This can be done with or without narrated audio. 2. Use the video camera to capture a closing segment for the program - this can be either a student, a display showing the extended forecast, or more outdoor scenes. This can also be done with or without narrated audio. 3. Plug the camera into the computer using the firewire cable. Switch the camera to the VCR mode. 4. Open iMovie and create a new project. Include todays date in the title of the project. 5. Import the opening and closing video segments to the clipboard. 6. Click on any of the links below to display current weather maps and satellite images. Position the cursor over the lower right corner of each image, hold down on the mouse, and select SAVE IMAGE. Save each image to the desktop. #1 Current Midwest radar from Intellicast #2 Current infrared satellite image from the Datastreme Project #3 Current national map from The Weather Channel #4 Local conditions and five day forecast from USA Today Weather 7. From the iMovie PREFERENCES, set the time that you would like each weather map or satellite image to be displayed during the broadcast. 8. Drag down to IMPORT FILE and select the first image saved on the desktop. It should now appear on the clipboard. 9. Repeat this procedure for each of the other saved weather maps and satellite image. If you choose to shorten or lengthen the time it is to be shown in the iMovie, you must change the setting in the PREFERENCES before importing the image file. 10. Arrange the opening and closing clips and the still weather map and satellite image clips into the desired sequence. 11. Insert the opening title, closing title, and transitions of your choice. 12. Plug the microphone into the computer, select audio from below the iMovie clipboard. 13. Record your voice as the audio to accompany the sequence of clips. If you have already recorded dialog during the opening and/or closing clips, you'll need to record your voice ONLY over the still clips in the middle of the program. If there is no narration in the opening and closing video footage, you can record voice narration from start to finish. 14. Once you are satisfied with the final program, save it on the desktop. It will then need to be imported into iDVD and burned onto a DVD. 15. Congratulations - you have created a complete weather report program! |